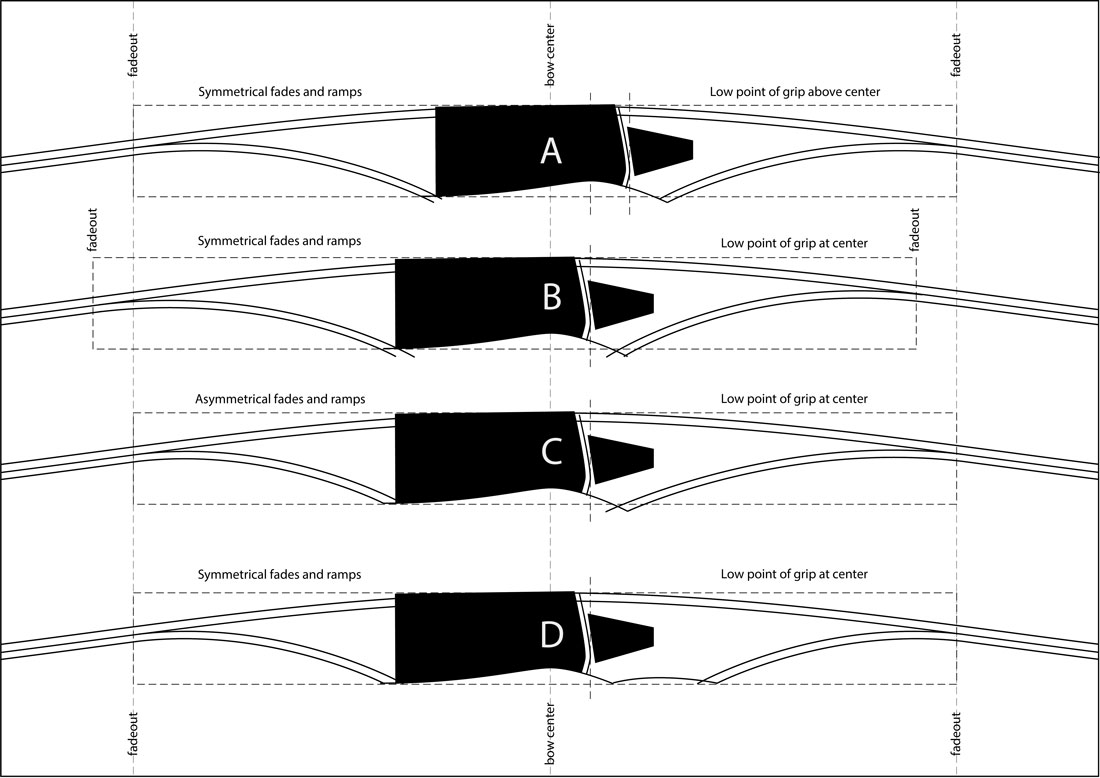
I’ve experimented with making longbows with four different riser layouts. Riser A represents probably the…
Grip size of a recurve
In the previous post, Grip size of a longbow, I listed some basic sizes for locator style longbow grips. In this post, I’ll provide the same information for recurves—the best ways to measure a grip and suggested measurements for small, medium, and large recurve grips.
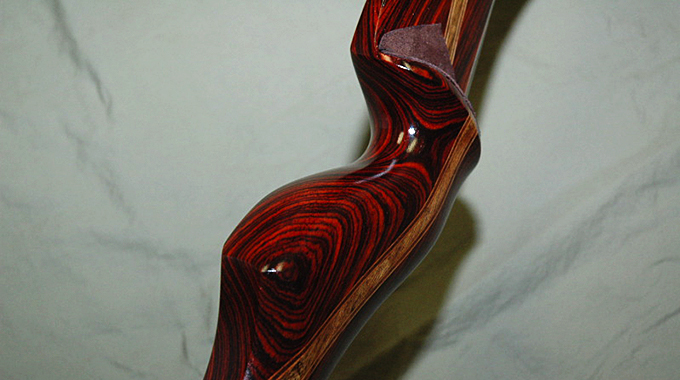
Most people consider the riser of a recurve the most beautiful part of the bow, so naturally the most fun part of making a custom recurve is carving the riser and shaping the grip so it looks good and fits your hand. Shaping the handle might bring out your artistic abilities and give you the chance to be creative, but it also gives you the opportunity to shape the grip to fit your hand and match your personal style of holding the bow.
A modern, traditional recurve bow typically has a sculpted, pistol grip. This grip style is dramatically shaped to fit the bow hand, having a very deep cut out for the web of the hand and a palm swell to fill up and support the palm. It is shaped in thickness as well as in width.
The throat of the grip—the thinnest, deepest and narrowest part—is located at the locator point where the thumb and forefinger hold the handle. For most recurves, it is usually located in the center of the bow in both length and width. The grip can have a low, medium, or high wrist, depending on your preference, and the palm swell can be sized to match the shape and size of your hand. The cross section at the deepest point of the grip is usually slightly thicker (fore and aft measurement) than it is wide (side-to-side measurement).
This sculpted style grip is probably the most popular grip style because it is very comfortable to hold, and it helps your hand settle into the handle for each shot. When your hand naturally settles into the same position for each shot, it is much easier to shoot more consistently, which naturally leads to better shooting accuracy.
Width, thickness, and circumference
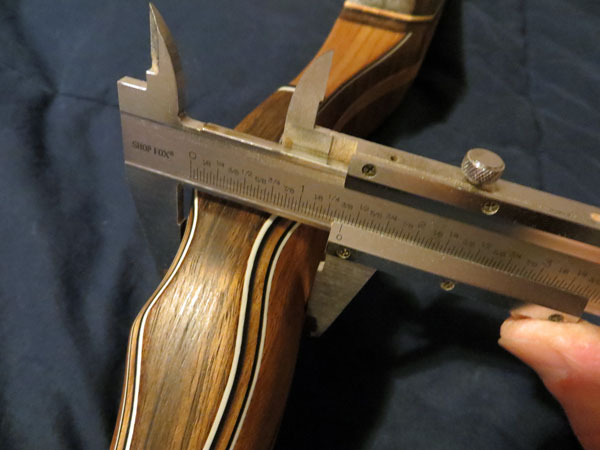
I like to quantify grip sizes and dimensions by measuring the width, thickness, and circumference of the grip. The locator point is the narrowest, thinnest and deepest point of the grip, and where the thumb and forefinger grip the handle.
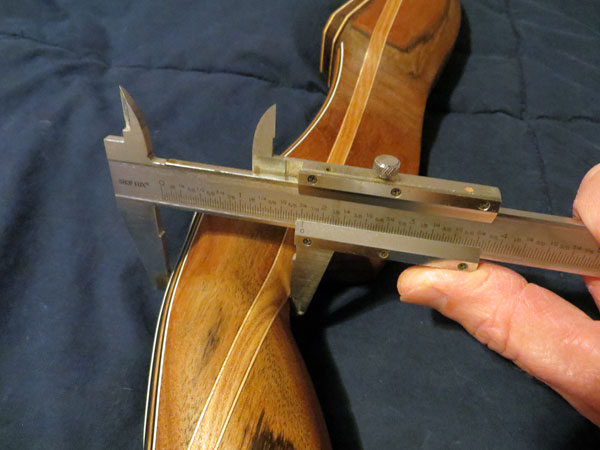
The width and depth are most easily and consistently measured with a caliper.
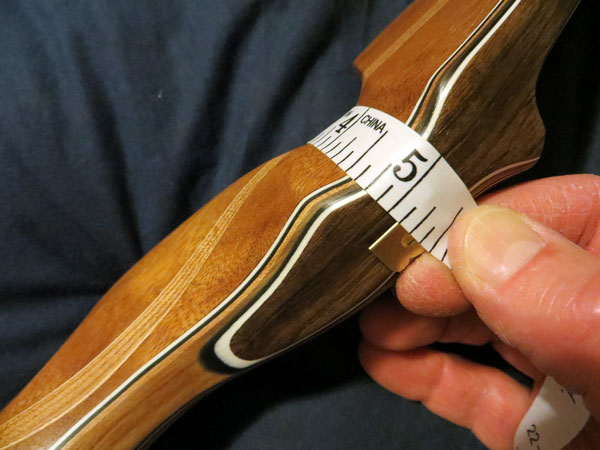
The circumference is the distance completely around the grip. It is most easily measured with a flexible measuring tape, or a retractable tape measure that has a flexible ruler. A retractable tape measure with narrow ruler seems to work better than a wide one.
Suggested grip measurements for recurves with a sculpted pistol grip
The grip of a custom traditional bow is usually smaller and more refined than the grip on a compound bow or factory manufactured bow you might find at your local sporting goods store. Obviously, the most comfortable grip size is determined by the size of the shooter’s bow hand and personal preference for the way the grip feels. Plus, we all know that men, women, and children have different hand sizes. The width-to-thickness preference can vary for different shooters, so the following measurements are simply a good place to start. Some archers prefer a narrower, thicker grip while others prefer a wider, thinner grip.
Small (Youth): 1-1/16” wide x 1-3/8” thick x 4-1/4” circumference
Medium: 1-1/8” wide x 1-9/16” thick x 4-3/4” circumference
Large (Normal): 1-3/16” wide x 1-3/4″ thick x 5” to 5-1/4” circumference
X-Large: 1-3/8” wide x 1-13/16” thick x 5-1/2” circumference
XX-Large (WHOA!): 1-9/16” wide x 1-15/16” thick x 6” circumference
(All measurements are taken at the narrowest/thinnest/deepest point of the grip.)
When sculpting the grip, stop and measure the width and thickness frequently in order to get it right. The goal is for the grip to finish up with perfect dimensions just as the finish sanding is completed with 220 grit sand paper and the bow is ready to spray. So, start by cutting it out oversized and work it down with rasps, files, sanders, and finally sand paper, until all of the tool marks are gone and the grip is smooth.
You might also like the posts:
Low, medium, and high wrist grips for a recurve
When sculpting a grip, stop and measure the width and thickness frequently in order to get it right. The goal is for the grip to finish up with perfect dimensions just as the finish sanding is completed with 220 grit sand paper and the bow is ready to spray. So, start by cutting it out over sized and work it down with rasps, files, sanders, sand paper, etc. until all of the tool marks are gone and the grip is smooth. – See more at: https://buildyourownbow.com/grip-size-of-a-longbow/#sthash.2HzbojEp.dpuf
Related Posts
I would say only one thing. Thanks Jim!
Thanks for the article Jim. I would like to ask a question. If you wanted to make a high wrist grip, what angle would you use?
Something close to this… low 30 degrees, medium 35-40 degrees, high 45 degrees. I'm making a drawing and will add it to the post.
Here's a new post…
http://buildyourownbow.com/low-medium-and-high-wrist-grips-for-a-recurve/
The suggested grip measurement guide is great! Definitely a useful and easy to read tool for people to use (especially for beginners). Anytime you can provide a quick reference like that is fantastic! Thanks for sharing!
Thanks for the info Jim. I’ve never built a bow but am wanting to try it. I’m currently living/working in Indonesia but am from US. I harvested some bamboo last week and waiting for it to dry. I was wanting to make a triple lam R/D. Planned on using bamboo for the back,ulin/bamboo lam (four strips of vertical grain bamboo and strip of ulin on both sides) for the core, and not totally decided on the belly (either bamboo or ulin). Ulin is called ironwood here. First have you ever used ulin or do you have an opinion? And second am I wasting my time with the vertical grain lam for the core?
Very interesting info about the wood. No I have not used it. I’m thinking the vertical core lam will be fine.