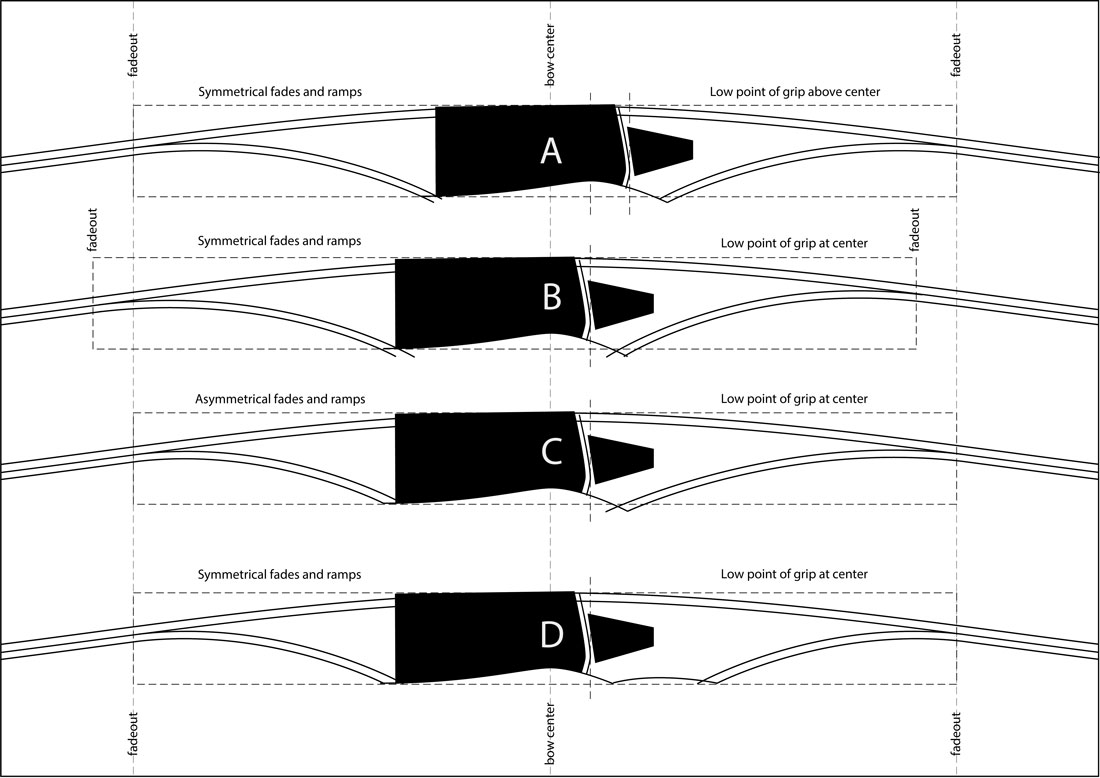
I’ve experimented with making longbows with four different riser layouts. Riser A represents probably the…
How to make a plains Indian quiver
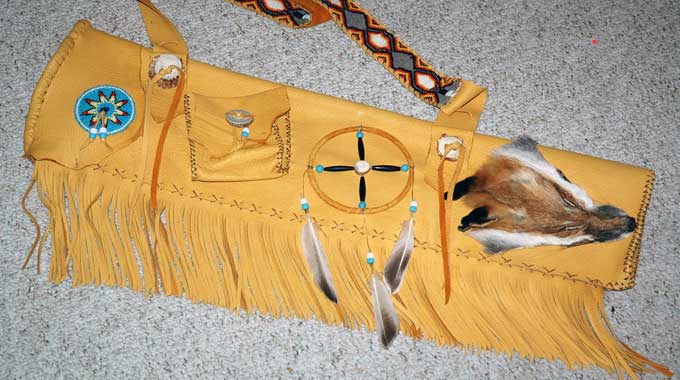
One of the most comfortable quivers to carry in the field or woods is a plains Indian style quiver. This one was made long enough to cover the fletchings of a standard 28″ arrow with field points or broadheads with just the nocks sticking out of the top. With the nocks showing, they are easy to get a hold of with your fingers, but with the fletchings covered up, they don’t make loud scratching or scraping noises against stuff like tree branches or even the ground if you are crawling around. I just find this quiver style to be a really comfortable and quiet set up for hunting.
This quiver was made with tanned elk hide, sinew thread, and as you can see, an assortment of decorations made from beads and a tanned red fox face. I got all of this stuff from various auctions and shops on Ebay. I think the color of this hide is too bright and stands out in the woods like a neon sign, so if you are making one for hunting, you’ll probably want to get some hide with a darker stain. The elk hide is just the right thickness. It is thick enough to maintain its shape and not flop around, but flexible and supple enough to feel soft and collapse gently around the arrows, keeping them in place and keeping them quiet. Deer hide will work, but it is thinner and pretty floppy. Cow hide is too thick and stiff unless it has been split to make it thinner. Elk hide just seems perfect for this style of quiver. I put the rough surface on the inside and the smooth surface on the outside.

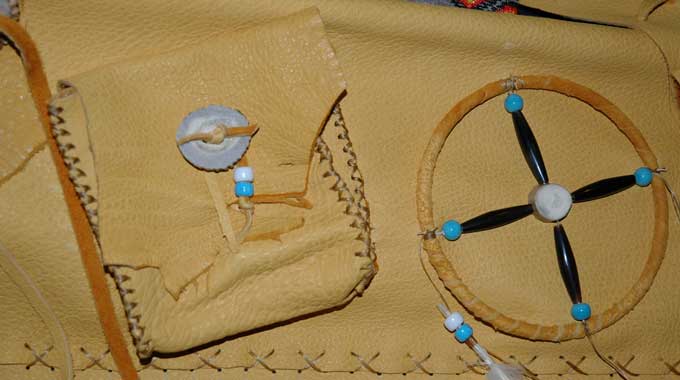
The bead work I found came as already assembled pieces and all I had to do was sew it on to the elk hide. For the medicine wheel, I found a steel hoop, covered it with strips of leather, and then tied on the beads and feathers with sinew thread.
The basic process for making the quiver is this: get all of the materials (hide, sinew thread, beads and decorations, etc.), layout the hide, mark out the pattern, cut out all of the pieces, punch the holes, sew it all together with sinew thread, then attach the decorations. For sewing together the main body, it helps to double or quadruple up the sinew into a thicker thread. I also found it easiest to sew on the fringe as one piece of material then cut the strips after it was sewn on. Making the quiver is really that simple. It just takes a lot of time! This one probably took me six to eight hours to make…two or three evenings after supper. I have to say, it was a really relaxing and enjoyable project. I like touching the natural materials and messing around with the decorations, planning where they would go and deciding on the pattern of the beads. In hindsight, this quiver ended up with way too many decorations. For the next one, I think I’ll make it with only the pocket and/or maybe one decoration. It was too easy to get carried away with adding things until the entire thing was covered up. I have to admit that the fox face added a lot of character, so I might use one again on another project. The buttons on the strap and pocket were made from some old deer antlers I had laying around. Just cut off some slices with a hack saw, sand off the edges, and drill a couple of holes in each one. You can make different button sizes for each location depending on its purpose…large ones for the strap and a small one for the pocket.
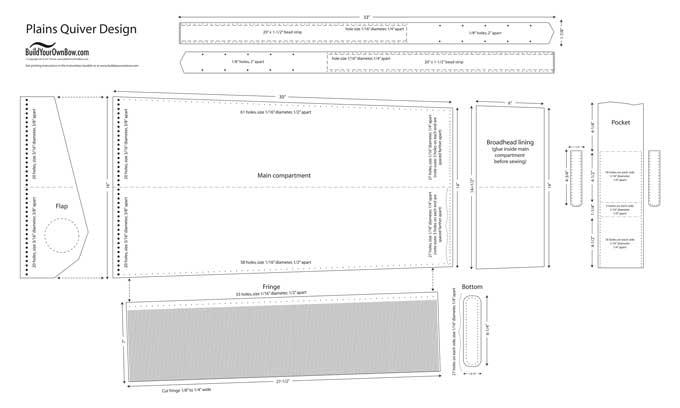
This quiver seems like just about the perfect size for an adult man. The body compartment is about 2″ x 8″ x 30″, the outside pocket is about 1-1/4″ x 4-1/2″ x 4-1/2″, and the strap is about 1-7/8″ x 66″. I cut two pieces of strap and joined them together in the middle. Try to get a piece of hide or material that is large enough to cut all of the pieces out of the same piece. This makes all of the parts match with the same texture, thickness and color.
I drew out a blueprint for this quiver design. To download the PDF blueprint, click HERE or click on the photo below. The blueprint is 60″ wide x 36″ tall, so to print it out full sized and in one piece, take a copy of the file to your local duplication center who has an over sized printer…Staples, Office Depot, FedEx Office, etc. It will cost a few dollars, but you’ll end up with a full sized blueprint you can cut up to use as a pattern. There are additional instructions on the blueprint.
Oh yeah, it also has an internal stiffening rod inside the main compartment that runs from strap to strap. I used a dowel rod, but a stick or an arrow shaft should work fine as well. The rod is tied in at each end with some wraps of sinew thread. This keeps it from wrapping around your body or folding over and pinching your arrows. Thanks to the readers at the primitive bow making group at Facebook for pointing this out!
Related Posts
Comments (0)