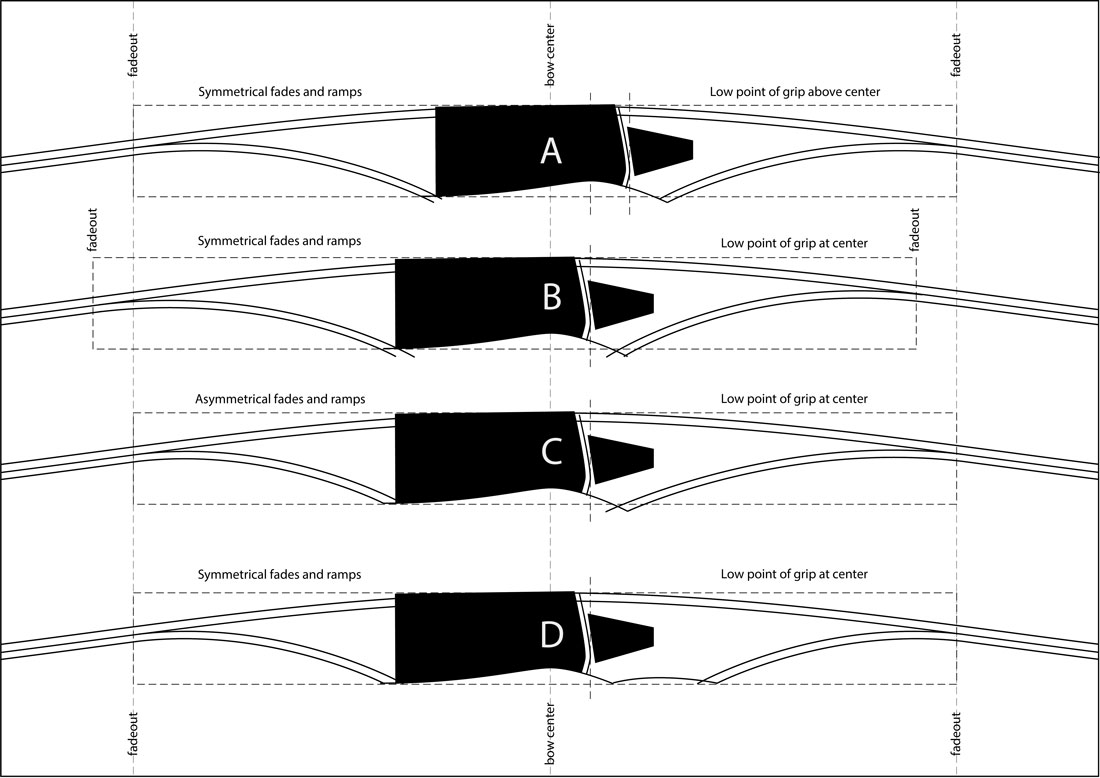
I’ve experimented with making longbows with four different riser layouts. Riser A represents probably the…
How to make and read a force/draw curve (part 1)
Building and setting up the bow weighing rack
Hey!…I’m so glad that you are here and interested in learning how to weigh your bow and make a force/draw curve! There is so much you can learn about your bow from the force/draw curve. Are you sometimes dazed and confused by scientific-type folks who use intimidating words like “stored energy,” “peak draw force,” and so on? If so, you’re not alone. This force/draw stuff can be very confusing. Let me encourage you to stay with me on this series…once you read through these posts and try it out on your own bow, you won’t be intimidated any more.
In this series, I will explain using simple words, and very little math, how to plot a force/draw curve and interpret the results for your bow. I won’t even write any formulas in the text. I’ll even provide a free download template that you can use to make your own force/draw curve using Microsoft Excel. Just follow this guide and you’ll learn how to easily make a FDC curve for your bow. I’ll teach you the graph reading tips you’ll need to easily read the force/draw table and force/draw curve to discover some important things about your bow…important things that you cannot learn in any other way. Let’s get started…
First, we need to measure the draw weights of the bow, so in this post I’ll show you how to set up a bow weighing rack that is integrated with your tillering tree, measure the draw weight(s) of your bow, and record the data so we can use it later to make the force/draw curve.
Building the rack
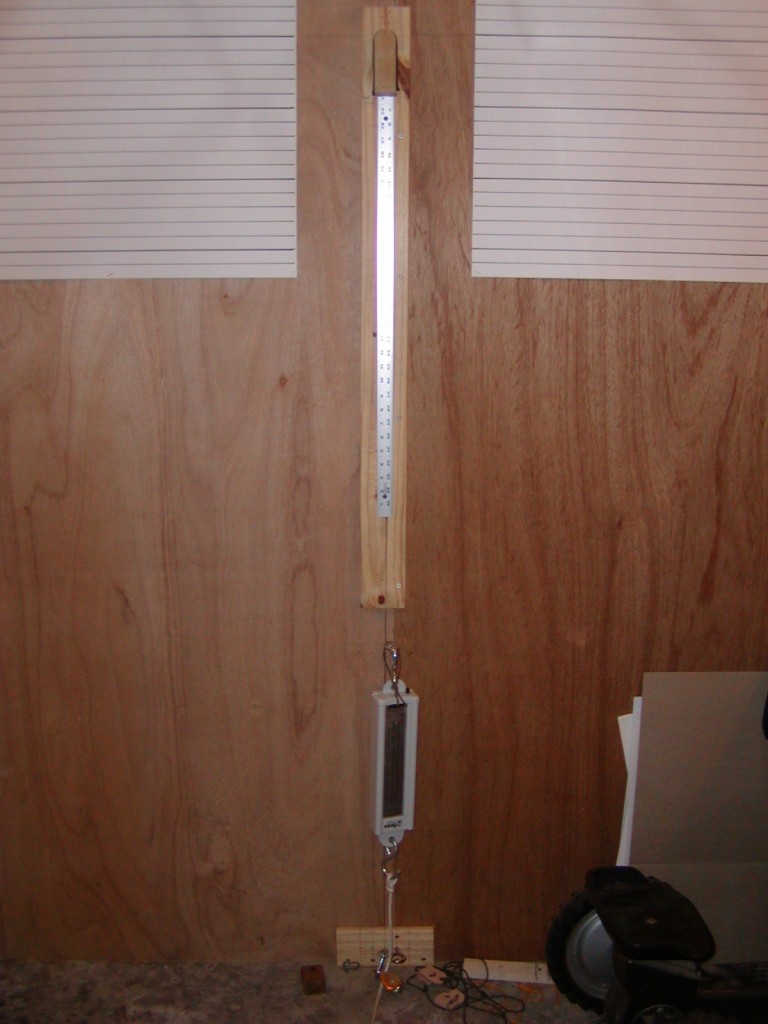
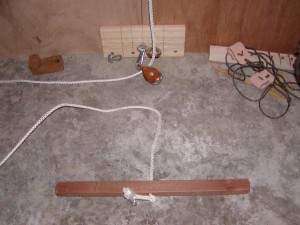
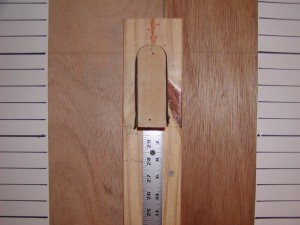
The photo below shows my bow weighing rack. As you can see, it is also a tillering tree. It consists of a 1″ x 6″ board screwed to a stud on the wall, a pivot stop at the top to hold the bow at the handle, a cheap aluminum ruler from the local discount store, a bow scale, and a rope and pulley at the bottom. With the rope going through the pulley located at the bottom of the rack, it pulls the bow string staight down, and it allows me to stand back from the bow and see the bow while pulling the rope. In fact, I took all of these photos myself while pulling the bow.
>Click on each photo to see it larger<
Getting the measurements right
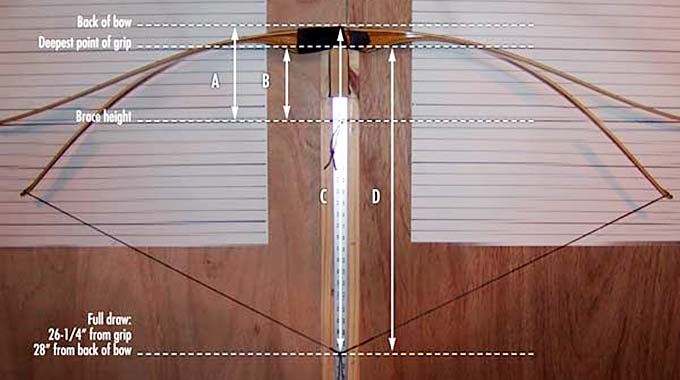
In the photo below, I used Photoshop to superimpose photos of the bow at brace and the bow at full draw. To make things simple on this test, I set the brace height of the bow at 6-1/4″. This allows the draw length measurements to be recorded at even, one-inch increments according to AMO standards. You’ll understand what this is about when we start filling out the draw weight table and make the FDC. In order to make our force/draw curve compatible with AMO standards and be comparable to other people’s tests, let’s measure and record the draw force of the bow at each one inch increment of the draw from brace height out to 26-1/4″ from the deepest point of the grip. Remember, I am measuring it this way because the AMO draw length is measured from the virtual back of the bow, which is 1-3/4″ from the deepest point of the grip to the nocking point on the string.
The quote below is from the AMO Standards PDF. You can download the file from www.amo-archery.org.
AMO DRAW LENGTH STANDARD
For Manufacturers
Draw length is a specified distance, or the distance at the archer’s full draw, from
the nocking point on the string to the pivot point of the bow grip (or the theoretical
vertical projection of a tangency line to the pivot point parallel to the string)
plus 1 3/4”. Draw length from pivot point shall be designed at DLPP and shall be
called TRUE DRAW LENGTH.
EXAMPLE: 26 1/4” DLPP plus 1 3/4” is the equivalent of 28” draw.For Dealers and General Use
For practical reasons not requiring precise terms, draw length is the distance, at
the archer’s full draw, from the nocking point on the string to the back of the bow
at the arrow rest.EXPLANATION: The standard Manufacturers is consistent with the Bow
Weight Standard as related to the pivot point. The DLPP plus 1 3/4” is compatible
to previous concepts of draw length. (See handle illustration.) Draw length
for Dealers and General Use relieves the burden of preciseness not required for
general use and facilitates determining arrow length. THIS STANDARD SUPERSEDES
THE PREVIOUS STANDARD.
This may seem a little complicated now while we are setting up the weighing rack, but don’t worry…we only have to do this once while setting up the weighing rack. After it is set up, we don’t have to mess with it again. We will just put a bow on the rack and pull the string down to 28″ and know that it is consistent with AMO measuring standards. Since we have to set it up in some way, anyway, let’s just set it up like this so it is AMO-friendly.
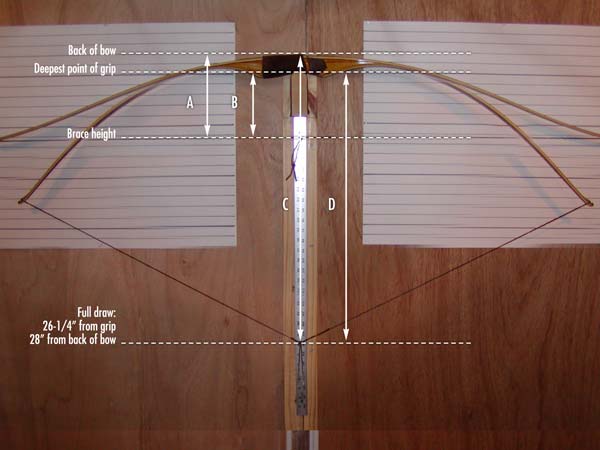
A = The distance between virtual back of the bow to the string. According to AMO, the virtual back of the bow is considered as 1-3/4″ towards the back of the bow from the deepest point of the grip. This lets you measure all styles of bows on the same rack regardless of the depth of the handle (selfbows, longbows, hybrids, recurves, compounds, etc.).
B = Brace height. On this bow, I set it at 6-1/4″ from the deepest point of the grip to the string.
C = AMO draw length…which is 28″ from the virtual back of the bow to the nocking point of the string at full draw. So C = 28″ (which is 26-1/4″ + 1-3/4″)
D = 26-1/4″ from the deepest point of the grip to the nocking point of the string at full draw.
Pulling the bow and measuring the draw weights
OK, the last thing we need to do is to pull the bow to full draw and record the draw weights at each one inch of the draw stroke. Congratulations if you have a lovely assistant who is willing to read the draw weights and write them down while you pull the bow. I did this by myself for this example and had to stop every few inches to write down the draw weights. While this is not the most accurate way of doing it, I got the job done by reading the draw weights while I was pulling down on the string. You will get the most accurate and consistent weight readings if you use a steady pull on the rope and read the scale as the string passes each one inch mark on the ruler. If you slow down or let up on your pull while reading the scale, it will give an inconsistent draw weight value.
Recording the data
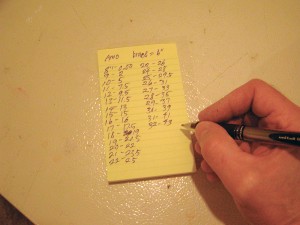
In the photo below, you can see how I wrote down the draw weights. I wrote down 8″, 9″, 10″, etc… all of the way to 32″ on the left, then filled in the draw weights on the right as I pulled the bow. (Note that I started at 8″ because that is the brace height of 6-1/4″ plus 1-3/4″ to make it AMO-friendly.) Oops…I see that I made an error on the note…I should have written “brace = 6-1/4″.”
I wouldn’t have needed to pull it all of the way out to 32″, but this is a fiberglass composite bow, so I wasn’t worried about damaging the bow. Now, if this had been a selfbow or wood composite bow, then I would have not pulled it past the draw length for which it was tillered. Nor would I have held it at full draw for very long. On wood bows, I like to have an assistant record the data, while I smoothly pull the bow to full draw and immediately let it back down, while reading the weight readings as the string passes each inch on the ruler.
This is all of the data needed to create the force/draw curve! I will save this paper and take it to the computer for use in creating the force/draw table and force/draw curve.
Watch for the next two parts of the series. In part 2, I’ll show how to use the computer template that I created to make a force/draw curve, and in part 3, I’ll show you how to read the table and graph and interpret what it tells about the bow. You’re going to like knowing how to do this…its a lot easier than you might think!
Click the links below to see the other posts of the series:
Part 2: How to MAKE a force/draw curve.
Part 3: How to READ a force/draw curve.
See you on the next post!
Please share this post with your friends, and feel free to leave a comment or ask a question.


Awesome site.
Thanks Richard!