Welcome to the SuperTiller build along page! I guess you are interested in computer modeling? Well, good for you! Here is a short build along for using SuperTiller.
SuperTiller is a computer modeling program written by Alan Case. It works by breaking a hypothetical bow limb into several segments and calculating how these segments “bend” as the bow is pulled to full draw. You enter all of the design parameters of the bow you want to model: length, width, thickness, materials, material type, string type and number of strands, etc. Then when you run the program, it will “draw” the bow and spit out many charts and graphs. The most useful chart is probably the force/draw curve. It also generates the back view profile, side view unbraced profile, side view braced profile, and side view full draw profiles. I find these very useful when considering a new bow design just to see how SuperTiller predicts that the bow will bend. Obviously, there is no substitute for building a real bow and testing it, but I think that by testing bow changes in SuperTiller, I’ve learned a lot about how each design feature affects the way a limb bends and how it affects the resulting force/draw curve.
Here’s at least a $1,000 tip for you… if you can learn from computer modeling how little changes in design affect the dynamic bow profiles and force/draw curve, then you are well on your way to making better shooting bows, and you probably just saved yourself at least a thousand dollars of building and testing.
The instructions PDF is somewhat vague, so I will attempt to show you in layman’s terms how to use SuperTiller. I am not an engineer, so I can’t interpret or explain everything in the program. I am still learning many of the basics. If you have technical questions, contact Alan Case who wrote the program. The instructions PDF says you can reach him by email at ahcase@comcast.net.
First, download one or more of the program files below
There are three versions of the program that I know of. They work in different versions of Windows and Excel:
SuperTillerV6R01a.xls
SuperTiller6_6.xls
SuperTiller6.2.xls
StickBowDesignProgramInstructions_draft.zip (Instructions PDF)
SuperTiller is a spreadsheet that runs in Microsoft Excel. It has macros to do the calculations. These macros will only run on a PC and don’t work on a Mac.
First, download the instructions PDF file and read it. Follow the instructions in the PDF to get SuperTiller running on your PC. This part of the instructions are very clear. It gets unclear when you try to design your bow, so that is where I will begin.
Once you get it running you are ready to follow this build along
On this build along I will create my 1-1/2″ deflex and 3-1/2 ” reflex hybrid limb design in SuperTiller. First I must draw the side profile of my limb and plot the x and y coordinates so I can plug these into SuperTiller. Since I already have this profile in Adobe Illustrator, I simply made a new file with the limb profile and drew a grid over it having 1″ squares. Then I put a dot on the limb every two inches and wrote down the coordinates of these dots. Then I printed this out on paper so I could plug the coordinates into SuperTiller.
I made the red line the “0” line of the y-axis. I made it this way to match the way I measure deflex (from the deepest point of the limb to the riser back) and reflex (from the deepest point of the limb back to the nocks or limb tip). You could also put the “0” at the riser back and I have done it that way before. Notice on this drawing that this bow actually has 1.6″ deflex and 3.4″ reflex (to the string nock) even though I call it 2″ deflex/4″ reflex.
This is my limb plot that I printed out…
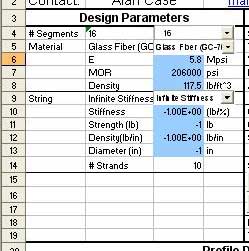
The photo below is the first “sheet” or view you will see once inside Supertiller. First of all, print out your instructions pdf and hold it in your hand while plugging in the “Design Parameters” of your bow. Once you enter some basics here, they won’t change much.
Look closely in the photo below and you can see that I selected 16 segments. SuperTiller breaks the limb down into these segments to do the calculations. Use the pull down arrows to make your selections for # segments, material, string type, then put in the number of strands. ST will auto generate the values shown in blue. I plugged in 16 segments, glass, infinite strength string, and 10 strands.
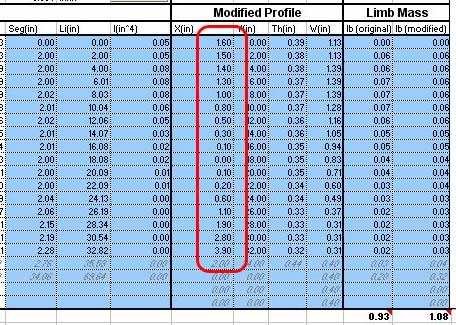
Next, I like to enter the bow profile. In the next photo below, I enter the “X(in)” coordinates from the printout that I made of my limb. Notice that the chart already has the “Y(in)” coordinates listed as 0.00, 2.00, 4.00, etc. This was auto generated when I selected 16 segments. Start with the bow center coordinate at the top…(1.60, 0.00) and enter each coordinate from the limb printout. This is one of the confusing parts of the program. Always enter your profile here at “Modified Profile.” ST will auto update the “Seg(in)”, “Li(in)”, and “I(in^4)” values. Once the coordinates are entered, push the “Update” button located just above to lock these in.
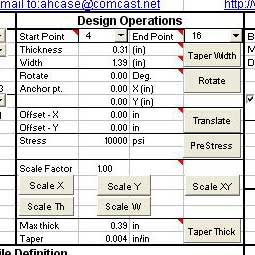
The next photo below shows design operations. This is where it gets tricky. SuperTiller will auto generate a pyramid width taper with an equal thickness limb. Since we want a straight taper, lets enter the width values here in “Design Operations”. I chose the “Start Point” of 4, which is Y-coordinant 4, or about 8″ from bow center, and an “End Point” of 16, which is for the 32″ tip of the limb, to start the calculations for the width taper and thickness taper. I’m actually using an 18″ riser which would be a starting point of 9″ but this is good enough for what I’m trying to test. I plugged in a “Thickness” of 0.31. THIS IS NOT THICKNESS–THIS IS THE WIDTH AT THE TIPS. It took me awhile to figure this out. I plugged in a “Width” of 1.39 which is automatically rounded up from 1-3/8″ wide at the fades. Then pushed the button “Taper Width”. I left all of the offset, stress, and scale factor stuff alone, setting them to zero or whatever. Scale Factor has to be 1.00 which means 100%–don’t make the limb larger or smaller. Another tricky thing here is that “Max thick” and “Taper” really won’t matter here if I want Supertiller to autogenerate the pyramid width taper (which I do because it is difficult to calculate and manually type in). Supertiller has a feature built in where it will auto adjust the limb width taper to keep the bow from breaking. I don’t want it to do that in this test, so I’m going to let it auto generate the pyramid width taper, then I’m going to manually change the thickness taper. Get it? I’ll show this later.
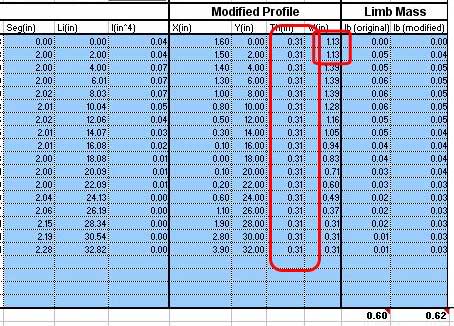
After I pushed the “Taper Width” button, this is what SuperTiller did (next photo below). Notice that the numbers indicate there is a pyramid width taper and an equal thickness of 0.31 (large red box). I manually changed the 1.39 at segment 2 and 4 to 1.13 for the handle to be 1-1/8″ wide (small red box).
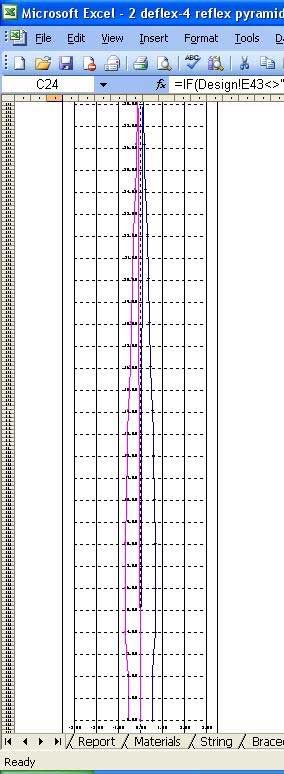
At the bottom of the Excel window, now I selected the tab for “Limb Section” sheet, which shows the back profile. Looks good, eh?
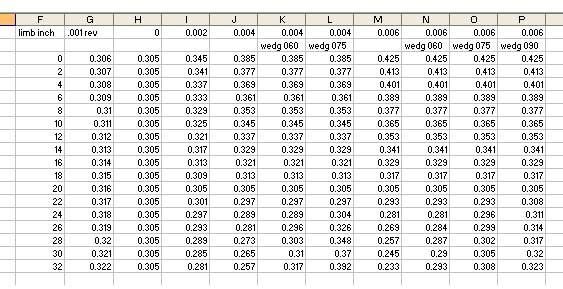
Next, I’m going to manually set the thickness settings to a .002 taper starting with a max thickness of .345. I could have calculated these in my head or done it on a piece of paper, but instead I created a separate spreadsheet with several taper options that looks like this…
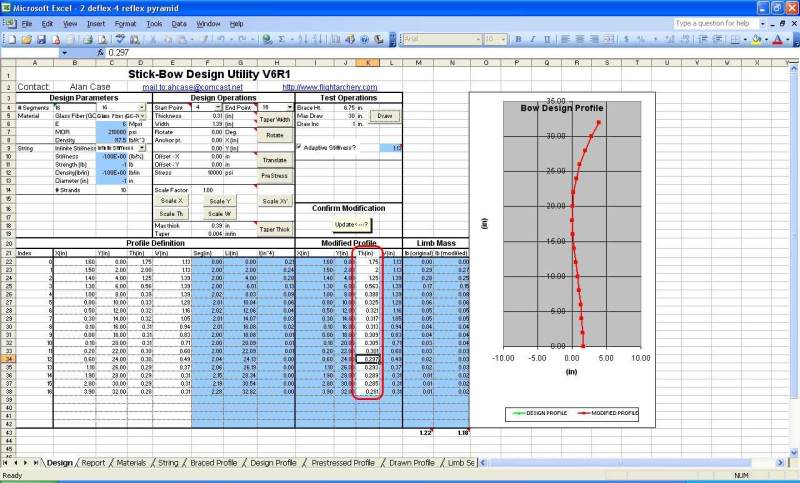
Now, I just copied the 002 column into the SuperTiller Modify Profile like this…
Then, I pushed the “Update” button above, typed in the Brace height, max draw, and Draw Increment, then pushed the “Draw” button above that to run the program and generate the report sheet.
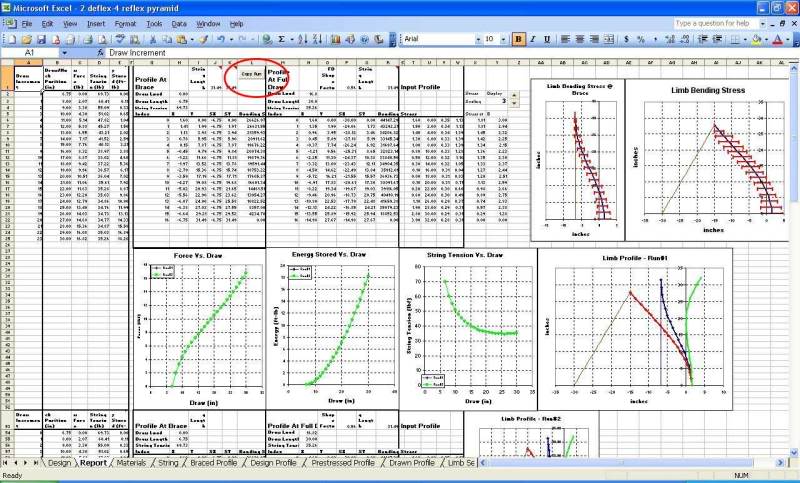
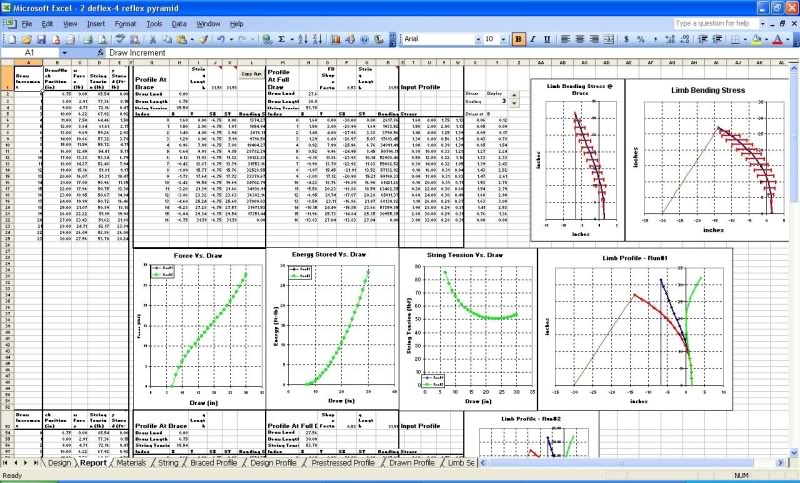
Here is the Report sheet for the .002 taper. Since I’m going to do another taper test and want to compare it to this one, I’ll push the “Copy Run” button (red circle) so SuperTiller will remember this data for the next run.
Now compare the limb profiles in SuperTiller to these actual photos of the .002 taper bow. Pretty close, huh?

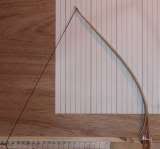
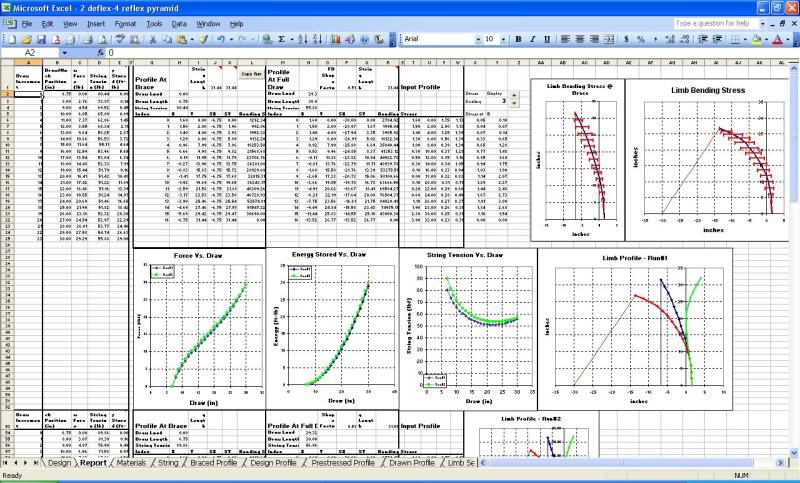
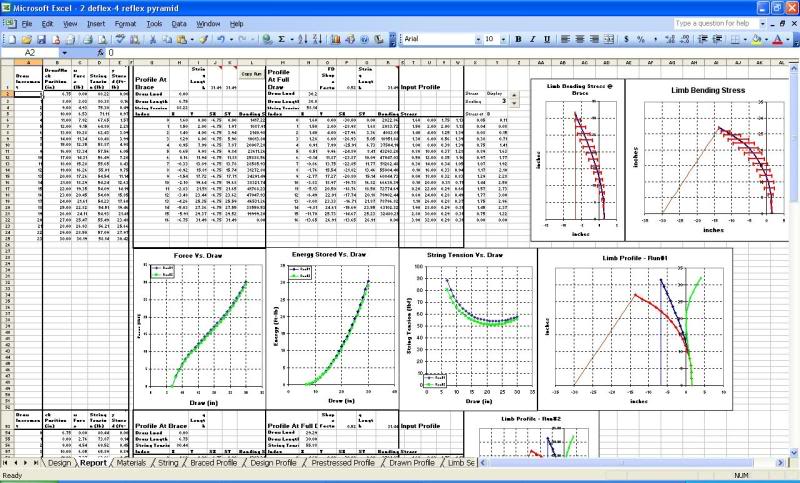
The screen shots below show the updates that I made to fix the riser thicknesses. This is the .002 taper bow. It is interesting that the profiles look a little different than the actual bow now…in fact they look better than the actual bow unfortunately. You can see the figures changed in the red circle for points 0, 2, 4, 6, and 8. And in the report chart on the lower right you can see how the base of the limb is now staying straighter.
002 taper with the riser thicknesses fixed…
002 taper with the riser thicknesses fixed…
The screenshot below shows the next taper comparison… an .006 taper. Notice how the tip is bending more than the 002 and 004 taper. Also notice on the curves that it (the blue line) is storing less energy. In this comparison you can see the cause and effect of the tips bending more and making the string angle larger.
And the screen shot below shows the final comparison… an .006 taper with a 8″ .060 tip wedge. Notice how the tip is bending less than 006 without a wedge. This now shows how the tip wedge has fixed the bending problem in the tips. Notice on the curves that it (the blue line) is now storing more energy.
I ran tests all of the way up to 006 taper with an 090 wedge. Peak draw force was highest at 006 taper with the 090 wedge. I’m sure that real world testing might possibly show deminishing returns on the the thicker wedges as the mass of the tips increases?
I will point out another confusing thing about the program. When you push “Copy Run” and make changes to the profile and run the program again to compare two profiles, Run #1 is actually the last run and Run #2 is actually the first run. Unless I am grossly mistaken, looking at the data points on the chart seems to confirm this is true. I’m sure you will figure this out as well.
Hopefully, this has shown the basics in using SuperTiller. There are several features that I didn’t show and some that I have never used myself. I’ll try to answer any questions. The instructions pdf explains how to read all of the charts and graphs. This is a really cool program. There are a lot of things you can learn by playing with different settings and tweaking your designs.


