How many blueprints do I need?
Using blueprints makes it easy to cut and shape bow forms, limbs and risers precisely to shape and exactly to scale. When you get the blueprints printed out at the print center, I highly recommend that you get two copies: one for making the bow form and the limb and riser templates, and possibly another one to use as a reference for the bow measurements while you are making the bow. The sizes of the individual bow parts are shown on the plans and not in the instructions booklets. Getting extra prints may seem like an additional cost right now, but it is very fast and very accurate. If you compare this to the extra time and possible loss of accuracy of transferring the plans by hand, I’m sure you will find that getting a couple of extra prints is well worth the investment. The cost of an extra print is small compared to possibly making your bow the wrong size! I’ve learned from trial and error that it is best to attach the blueprints to the bow form and templates and use them as an expendable cutting guide.
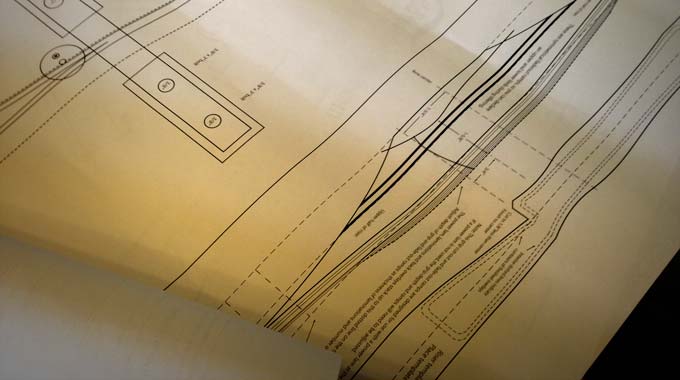
Using blueprints to make a limb form or bow form.
This is a hybrid longbow bow form blank that is glued and screwed and ready to make into a working bow form. At this point, I’m sure that many seasoned bowyers are close to having a coronary and screaming obscenities about using MDF for bow forms. Well, before anyone has a cow, let me defend this little build along by saying, yes, this is MDF, but it is only going to be used for the core. I am going to glue on reinforcing plywood onto the sides, top, and bottom to keep it straight, plus I’m going to seal it with polyurethane to keep it from absorbing moisture and warping. The reason that I like to use MDF for the core of the bow form is because it is so straight. I have tried gluing up plywood blanks like most other bow making tutorials suggest to do. The problem for me has been they always come out warped. The last time I tried using plywood, I spent $100 on the highest grade of plywood and it still came out warped. It was 1/8″ off. So, I went back to using MDF, but only using it for the core. Many builders swear that laminated beams or other blank materials are best, but I’ve seen them all warp. I believe that MDF will work just fine if you use plywood reinforcement layers on the outsides, seal them with polyurethane, glue on a strong formica or metal back of the bow surface, and store them in a place with constant (room) temperature and humidity (dry) by storing them indoors. I store mine in a storage room of my house that has a dehumidifier in the room.

The next thing to do is to measure and mark the form blank for positioning the blueprint. Mark the center of the blank to align with the center of the bow and several other places along the form. It doesn’t hurt to take a yard stick and check the blueprint to make sure it is printed straight out along the length of the print. You want to make sure that the blueprint is straight so the limbs will be symmetrical.

The next thing to do is to turn the blueprint over and cover it completely with stick paste. This is simply children’s stick paste from your local discount center or office supplies store. I’ve found that the white paste works the best. The blue gel type of paste evaporates too quickly which makes it hard to cover the entire blueprint before sticking it down. Add a couple of extra swipes of paste over the dotted cutting lines so the paper will stick down really well after the holes are drilled and the bow shape is cut with the band saw. Move quickly when spreading the paste, then flip the blueprint over and press it down onto the bow form blank, smoothing it out by starting at the center and moving towards the outsides.

The next step is to double check the position of the hardware straps by outlining them on the blueprint/form and checking the location of the bolt holes. Here’s a trick…if you mark the position of the steel straps and holes now before cutting out the bow shape, then the alignment will be perfect. Doing it this way, you won’t have to try to align all of the pieces later.

Check all of the hardware to see if all of the pieces are the same. If there is variation, for example, if some of the bolt holes are spaced differently, then mark each steel strap with a letter “A, B, C, etc.” or number “1, 2, 3, etc.” both on the straps and on the blueprint/form so you can match up the straps and holes after drilling. If the form will be used to make a LOT of bows, you might consider drilling the holes over sized and inserting a piece of reinforcement pipe inside the holes of the bow form to keep the holes from wobbling out after many bows are made. If the bolt holes and removable pins require different hole sizes, it helps to mark the size of each hole next to it on the blueprint so you’ll drill the right size in the right location. It is hard to redo these if you make a mistake.

Now that the form is all marked out with the hole locations and/or sizes, you can drill out the holes, preferable with a drill press. They need to be perpendicular with the sides of the form. For wood drilling, it is best to use a brad point drill bit for drilling clean holes in wood. It also helps to put a scrap piece of wood underneath the form so the bit will drill clean out the bottom side and not tear out the edges of the hole. Here’s a photo of a brad point drill bit.

The next step is to cut out the shape of the bow. There are several ways to do this, including sawing/grinding, using a template and a router so the limbs match, etc. The easiest way is to use a band saw or “saber” saw. The saw needs to cut perpendicular to the sides of the form. This is very important! The bow pressing surface needs to be perfectly square to the form along its entire length. If it is not, there will be twist built into the bow that is nearly impossible to correct when finishing the bow. Using a blueprint with symmetrical limbs, it is easiest just to use a band saw. Carefully cut on the waste side of the line on both sides of the bow. If you carefully cut right next to the line and preserve the bow shape, then you can use the bow shape to glue in the formica strip (gluing surface strip) later. Once the bow form is cut out, simply grind the form to the lines on the blueprint with a spindle sander, edge sander, and/or files and a block sander by hand, making sure to keep the surfaces square to the form. Use a square to check it in many places all along the bow surface of the form.

The next photo shows the bow shape all cut out and preserved for gluing in the formica strip. To remove the blueprint paper from the form, use a putty knife or scrap piece of bow lamination to scrape off the paper blueprint. If it won’t come off, try soaking down the paper with a wet washcloth. The water will dissolve the paste and then the paper will scrape right off. After a little clean up, let it dry completely, then you can glue on the outer plywood reinforcements. I simply trace out the bow form on 1/4″ plywood to cover the entire outsides of the form, then glue and screw it on. You can put on one side and drill the holes through, then put on the other side and drill those holes. This outer plywood serves as both reinforcement AND as spacers to keep the mounting hardware away from the sides of the form.

The final photo shows how easy it is to remove the blueprint once it is soaked with water to dissolve the paste glue. There you go…that’s how easy and precise it is to make a bow form using a blueprint.

Using blueprints to make templates for risers and limbs
Making templates is easy when using blueprints. You’ll need an extra copy of the blueprint that you can cut up and paste on the template material. Just about anything can be used for templates: flexible plastic sign board material, poster board, mat board, plexiglass, thin plywood, scraps from cardboard boxes, etc. Just cut out the bow pieces from the blueprint, use stick paste to put stick them onto the template material, then cut them out along the lines of the blueprint. Grind and sand the limb blanks so the sides are parallel to each other, then you can mark the center and connect the marks with a ruler. There are several ways to do this, but if the limbs are parallel, then this is about the easiest way. Align the limb template on the center marks, hold it down with some hand clamps and mark around it with a marker. That’s about it. For templates of the limb width profile, use something stiff, but flexible so it will bend around the curves of the back of the limb. Plastic sign making material works well for this. I get mine from a local sign making shop. It is expensive, but it works really well. The stuff that I use is about 1/16″ thick. Plexiglass probably works best for risers because you can see the figure or grain of the wood through the clear plexiglass. This makes it easy to position the outline of the riser according to the riser stripes or figure in the wood. That is really about all there is to explain about making templates.


